
Wednesday, December 25, 2013
Thursday, December 19, 2013
How to Enjoy Raclette in the US
.JPG)
Some of you may remember the post I created back when I was living in France all about Raclette and how awesome it is. Well I am happy to say I have finally figured out how to enjoy it in the States as well, albeit not quit as tasty, but pretty darn close.
Get Grilling
I actually found a raclette grill pretty easily. I got mine from Wayfair via Walmart's website for only $38. I thought the one I got was going to be awesome with it's little fondue pot, but turns out the part the grill it sets on is not solid like I was hoping. There is a while so that the fodue pot sets right on the heating coils. I don't really care for this since I would like the option of having more grilling room on top if I don't need to use the fondue pot. But other than that it works well. It has different temp settings and serve 8 (or 4 if you want each person to have 2 tray like I usually do).Cheesy Goodness
The hard part about doing raclette in the US is finding the right kind of cheese. Some people may find it easier to find raclette cheese depending on what part of the country you are in, and what kind of access you have to shops that carry it. I live in Kansas City and was super excited to find out that Trader Joe's actually sales traditional raclette cheese, and it comes from France. Only downside is it is just the plain kind so no yummy favors like cracked pepper, or smoked.
But what kind of raclette party would it be with just one kind of cheese? I have tried a few kinds of cheese with my grill and I am happy to report that provolone makes for a great cheese and melts quickly to a nice creamy texture. The best part is Whole Food carries a smoked version so I can still have my smoked cheese! Gouda was recommended to me and while I do love smoked Gouda as well and found it has the best flavor, it takes a long time to melt and tends to not be as creamy or melt as well. Swiss Melts well but has a fairly bland flavor by itself. Munster also did well and Havarti always melts well. Next I plan to try mozzarella (they also have this smoked at Whole Food), and maybe some pepper jack since it has great flavor, and a few other cheese. I will update as I find out more.
Meat, Meat and more Meat...Then pickles


Then of course you have to have the pickles. I love them in between trying different cheeses and I usually just go with a sweet gherkin, but you can try others as well. You could stick with any kind of baby sized pickle. Real French cornichons are the best kind though, but they can be hard to find. They are great because they are small like gerkins, but not as sweet, but not too sour like dills. Real cornichons also have pearl onions in them to help add flavor.
Tater Time

And voila, now you too can start enjoying the wonder and awesomeness that is raclette in your very own home!
Saturday, November 30, 2013
My First Thanksgiving
I wanted to try and make my first Thanksgiving as painless as possible so I pretty much decided the only completely new thing I would be cooking was the turkey. This was my Thanksgiving menu:
Turkey and Gravy
Stuffing
Mashed Potatoes
Green Beans
Roasted Carrots
Deviled Eggs
Rolls
Here are some pictures of the end products! I also listed where I got my dinnerware items in case anyone wants to find the same ones. You don't have to be Martha Stewart or spend a fortune to make a beautiful dinner.
 |
| I got to use my dad's mom's silver for the first time. It's a not a huge or fancy set but it is real silver. It means something to my dad so it means something to me. |
 |
| And since we were serving 4 it was an excuse to get some more pieces to my formal china. We only got 1 set for the wedding so I bought 4 more sets from Macy's. Best part is I got the matching oval serving plate I put the turkey on for free with my purchase! I think we'll just buy our formal china anytime Macy's is having a free gift give away with it. My china pattern is Silk Ribbon Slate by Ralph Lauren ($98 per 5 piece set at Macy's) and the glassware is Mikasa French Country Side ($12.99 per stem at Bed Bath and Beyond, cheaper from Mikasa's website). The silver is old and the name engraved in it said Lady Doris Silver Plate, also known as Princess Lady Doris. |
 |
| The table cloth and table runner both come from Bed Bath and Beyond. |
 |
| I got my napkins from Maison du Monde while I was living in France. I love that shop. It has tons of cool house stuff. I also brought back some wine glasses but they are a little more modern looking than my Mikasa ones. The napkin rings also come from Macy's (set of 4 for $14.99) |
 |
| I decided to do a short simple centerpiece so there would be plenty of room on the table for food, and so people could easily talk. Matt is always moving my pretty flowers out of the way if we have people over and he feel like he can't see them, so I decided to avoid it all together. I love using decorative balls as centerpieces because you can buy a couple shallow wide bowls and then buy whatever colors you want in the ball and it will go with anything. I decided to have mine match the dinning room instead of be fall colors. My walls are teal and the accents and hardware are gold. I got the glass bowl from TJMaxx for about $10 a while back and got the decorative balls from Hobby Lobby, half off of course. |
 |
| And now for the food. We all enjoyed a nice appetizer of shrimp cocktail from Whole Foods and I made Kir Royal, a french apertif made of sparkling wine and creme de cassis. |
 |
| And now for the food. My mom offered to make the deviled eggs, of which she is usually wonderful at. However this time we had a snafoo and she put too much salt in them since she is not use to my salt box and poured too much in at once. They were pretty much inedible but we put them on the table anyway just since they look so pretty. However mom made the gravy well. I was going to just forget about since I've never really made it. |
 |
| And of course it wouldn't be a special dinner without green beans the way Neenaw makes them. I usually use about 2-3 cans of green beans, but this time it was a full 6 cans to feed everyone, and have leftovers of course. I did make the error of not cooking all the water off the green beans like Neenaw always says you must do, but they were still pretty good. |
 |
| I did try one new side dish. I still remember the roasted carrots Rachel made for Thanksgiving back in France. They were so yummy and I have been trying to recreate it. This recipe was ok, but not quite the same. I added parsnips just because the recipe called for it, but I was not a fan of them. |
 |
| While I have made mashed potatoes before (though not the most tasty) I wanted to try a new method I had found on Pinterest. This recipe called for making the mashed potatoes in a crock pot. I was not a fan of them I think because it used yellow potatoes instead of russet. They had a bit a gluey texture and were very yellow instead of white and fluffy. I would like to try this method again but use russets and see if it still has a gluey texture. According to Alton, if you over boil them they will get a glue like consistency and that may be what the issue was since they were in the crock pot for while. |
 |
| I have never been a bread maker so I always go with pre-made ones. I personally prefer Sister Schubert's rolls. |
 |
| Matt is the pit master, the fireplace pit that is. Nothing feels nicer than enjoying dinner with a nice roaring fire. |
 |
| And the piece de resistance, the turkey! I got started the day before just to brine the turkey. I cooked a turkey from Alton Browns Thanksgiving Turkey Recipe. This recipe has almost 5000 reviews and still gets 5 stars, and for good reason. Though I did see another version of a Thanksgiving turkey that involved basting with an herb butter from Pioneer Woman I would like to try. While the turkey was great, I need to learn how to make a good homemade stuff. I made just some store bought stuff from Pepridge Farm and I was not impressed. |


 |
| And mom got the honor of cutting the turkey, since she is the only one who knows how. |
 |
| But soon Matt will be a carving master as well |


 |
| Keep dreaming dog |

 |
| Now let's eat! |
 |
| The cook concers, it is good. And she's her own worst critic |
 |
| But we're not done yet! Now it's time for pie, and what a pie it was. I tried this one once before to take over our neighbors for diner one night and it was an instant hit. So of course it had to appear for Thanksgiving. my Awseome Pumpkin Pie recipe comes from Taste of home. I would recommend topping it with Redi Whip, not Aldi brand. We had Aldi brand stuff and it just flattened out much faster and wasn't as fluffy. |
 |
| And with coffee of course. We also had a course of spiced warm wine |
All in all things went well and I think everyone enjoyed the feast. The hardest part I found was keeping everything piping hot until the rest of the stuff was done. I think buffet chaffing dish would have been helpful, so I might look into getting one of those. I hope this help inspires more people to brave the adventure that is cooking Thanksgiving dinner for their family for the first time.
Thursday, November 21, 2013
Pumpkin Pecan Streusel Pie
I have never been one for baking, but pumpkin pie is one of Matts favorite desserts during the holidays, so I thought it would be good to learn it. I found this recipe is in an old copy of Taste of Home and it was an instant hit. I wanted to make this for Thanksgiving when my parents came to visit, but I did a trial run with my neighbors when we went over for dinner and everyone loved it. They couldn't believe I had never made a pie from scratch before.

The only funny thing about this recipe is the pie filling makes waaaay to much. The first time I made it I over filled it too much. Make sure to only fill the pie shell up to about 2/3 full and save the rest. You can use it to fill up mini pie shells and have extra little plain pumpkin pies. The cream cheese filling can also be kind of hard to spread over the pie filling since the filling isn't that thick. One thing I have been meaning to try is putting the cream cheese filling in a icing bag and pipping it on top of the pumpkin pie filing. This way you get a more even covering over it. I also switched up the nuts the recipe calls for. Being from the south I always find pecans to be the best option. You can also lighten the recipe a bit (though not by much :S) if you use reduced fat or fat free condensed milk and cream cheese, and use Splenda where possible.
Pumpkin Pie Filling
1 refrigerated pie crust
1 can (15 oz) pure pumpkin
1 can (14 oz) sweetened condensed milk
1/2 cup sugar
1/2 cup packed dark brown sugar
2 eggs
1 Tbl all-purpose flour
1/2 tsp salt
1-1/2 tsp ground cinnamon
1/2 tsp ground nutmeg
1/4 tsp ground ginger
Cream Cheese Filling
1 package (8 ounces) cream cheese, softened
1/4 cup sugar
1/2 tsp pure vanilla extract
1 egg, lightly beaten
Streusel Topping
1/4 cup old-fashioned oats
1/4 cup packed dark brown sugar
2 Tbl all-purpose flour
1/4 tsp ground cinnamon
1/4 tsp ground nutmeg
2 Tbl cold butter, cubed
1/4 cup chopped pecans
Line a 9-in. deep-dish pie plate with pastry; trim and flute edge. Refrigerate while preparing filling. In a large bowl, beat the pumpkin, milk, sugars, eggs, flour, salt and spices until blended; transfer to crust. In another bowl, beat the cream cheese, sugar and vanilla until smooth. Add egg; beat on low speed just until combined. Spoon evenly over pumpkin layer. In a small bowl, combine the first five topping ingredients; cut in butter until crumbly. Stir in pecans; sprinkle over filling. Cover edge with foil to prevent overbrowning.
Bake at 400° for 15 minutes. Reduce heat to 350°; bake 50-60 minutes longer or until a knife inserted near the center comes out clean. Remove foil. Cool on a wire rack. Don't forget the whipped cream when serving :)
The only funny thing about this recipe is the pie filling makes waaaay to much. The first time I made it I over filled it too much. Make sure to only fill the pie shell up to about 2/3 full and save the rest. You can use it to fill up mini pie shells and have extra little plain pumpkin pies. The cream cheese filling can also be kind of hard to spread over the pie filling since the filling isn't that thick. One thing I have been meaning to try is putting the cream cheese filling in a icing bag and pipping it on top of the pumpkin pie filing. This way you get a more even covering over it. I also switched up the nuts the recipe calls for. Being from the south I always find pecans to be the best option. You can also lighten the recipe a bit (though not by much :S) if you use reduced fat or fat free condensed milk and cream cheese, and use Splenda where possible.
Pumpkin Pecan Streusel Pie
Total Time: about 2 hours
Serves: 8-10
1 refrigerated pie crust
1 can (15 oz) pure pumpkin
1 can (14 oz) sweetened condensed milk
1/2 cup sugar
1/2 cup packed dark brown sugar
2 eggs
1 Tbl all-purpose flour
1/2 tsp salt
1-1/2 tsp ground cinnamon
1/2 tsp ground nutmeg
1/4 tsp ground ginger
Cream Cheese Filling
1 package (8 ounces) cream cheese, softened
1/4 cup sugar
1/2 tsp pure vanilla extract
1 egg, lightly beaten
Streusel Topping
1/4 cup old-fashioned oats
1/4 cup packed dark brown sugar
2 Tbl all-purpose flour
1/4 tsp ground cinnamon
1/4 tsp ground nutmeg
2 Tbl cold butter, cubed
1/4 cup chopped pecans
Line a 9-in. deep-dish pie plate with pastry; trim and flute edge. Refrigerate while preparing filling. In a large bowl, beat the pumpkin, milk, sugars, eggs, flour, salt and spices until blended; transfer to crust. In another bowl, beat the cream cheese, sugar and vanilla until smooth. Add egg; beat on low speed just until combined. Spoon evenly over pumpkin layer. In a small bowl, combine the first five topping ingredients; cut in butter until crumbly. Stir in pecans; sprinkle over filling. Cover edge with foil to prevent overbrowning.
Bake at 400° for 15 minutes. Reduce heat to 350°; bake 50-60 minutes longer or until a knife inserted near the center comes out clean. Remove foil. Cool on a wire rack. Don't forget the whipped cream when serving :)
Monday, October 14, 2013
The Cakes and Table Decor
While the cakes were much smaller than I thought it would be, it certainly didn't disappoint on taste. We had a 3 tiered cake with 3 different flavors made by Sweets by Cindy out of Junction City. The wedding cake flavors were chocolate bourbon pecan for the bottom, white for the middle, and raspberry white chocolate for the top later. We also had a grooms cake that was in the shape of a pint of Guinness and was peanut butter flavored. For the cake topper I just used some fake hydrandea flowers that were a kind of antique yellowish color. I used them because they were what I had on hand and they ended up matching the gold icing for the designs really well. Cindy said the cakes were made to feed about 75 for the wedding cake and 25 for the grooms cake, though I'm sure you could feed more since her cakes are so rich. I can barely finish a cupcake. The wedding cake cost $200 (about $2.66 per slice) and the Grooms cake was $50 (about $2 per slice). If you are interested in getting cupcakes for your wedding in the Danville area, Cindy is the one to do it because as of my wedding she was selling cupcakes for only $1 each! Though she might charge more if you want the icing decorated in a certain way.


I was actually really amazed at the fact that I barely ate any of my own cake. While I made sure to eat dinner, which everyone says you forget to do, I didn't really eat much cake except what Matt smooshed in my face. I guess after taking some time to re-pretty my face I forgot all about it. I did however eat some of the grooms cake at the end of the night while everyone was cleaning up because I looooove Cindy's peanutbutter cake. However I was a bit sad she didn't following my directions to make the cake dark like guinnes by covering it with chocolate somehow, like just a chocolate frosting of a gnache. Chocolate and peanut butter are natures perfect couple. I was also quite surprised at how i had no clue how to cut into a tier cake. Thank goodness the catering people were there to cut it up for us.
 |


 |
| mmmm, cake |
I made all the extra decor for the table, except we got the giant cake stand from our caterer (at not extra cost might I add).
For the fabric garland I pretty much just took some old quilting fabric I knew I would never use that I had stahed away in the basement and cut it into about 1 foot long strips and 1 inch wide, more or less. I wanted it to have that worn look to it so the thread fraying only added to the charm. I wrap those pieces around some leftover chord i had from the save the date's and voila. I only made about 3 of these about 8 feet long. I found if you have your maid of honor work on it with you and start at opposite ends it gets done in about 20 minutes. Total cost was only about $6 since I already had the chord and most of the the fabric. I just bought 2 more colors of fabric from JoAnn Fabric from their scrap bin.
I also decorated the giant letters on the tables. I found them at TJMaxx for about $5.99 each and 2 of them came in the purple color but one was brown so I just went to Michael's and found some purple paint that matched them almost perfectly. Then all I did was take some pearl swirl stickers and some cute little scrapbooking flowers. I always get my stuff from Hobby Lobby when they have it 50% off, unless I need something right away. But for these items I just waited to see what new sale items would be each week and bought the things I needed as they were on sale. It saves you a ton of money. Total cost was about $30

Finally, I got my toasting flutes and cake knife and server forever and a day ago back when I was working a little cafe called Three Babes and a Monkey (totally not joking) about 8 years ago. I saw these in the gift shop they had and knew they needed to be mine for my wedding day. They were actually what inspired the decor theme for the wedding, what with all the pearls on them. If only the ribbon had been gold instead they would have been even more perfect. I have no clue how much they cost back then.

Sunday, October 13, 2013
Thank You Gifts: Simple, Yet Thoughtful

Price: $1.52 per person, $113.79 total without tax (for 75 people)
Inspiration: Pinterest (duh)
Helpful Hints: put the gift on the table at each place setting. I had mine on a table at the exit door and I guess some people missed them that way. Make something simple you would also like to keep since people will forget to take them anyway. And of course recruit your bridesmaids to help out with the craft. I was lucky to have Kim helping me.
~~~~~~~~~~~~~~~~~~~~~~~~~~~
It took me forever to decide on a thank you gift for guests, but I'm real happy with the ones I went with. Unless you have an infinite amount of time or are paying someone to make them for you, go simple, yet cut and somewhat thoughtful. I was inspired to make my gift from a pin I found (what else). I really loved how I was seeing all these guest gifts that meant something special to the bride. Maybe it was some homemade jam or some cookies, or something that reminded them of where they met.
I love tea and my favorite tea comes from a place back home called Elmwood Inn Tea. They use to be an actual Inn that had a tea room out in Perryville, KY. Sadly they have since closed the Inn and tea room, but they still sell their wonderful teas out of a recently open store front in downtown Danville, KY. And boy do they know their stuff. One of the guys who runs the place can tell you what country each of their teas comes from, what altitude it was grown at, heck he could probably tell you if it was picked on a Tuesday. I particularly love their Kentucky Blend tea, as to many people. It goes great with honey. So I decided to give each of my guests a couple tea bags of my favorite blend and attach a cute little label on it, as you will see (or have seen from the inspiration picture).
I almost went the crazy route and came close to trying to make these cute little handmade boxes filled with both tea and cookies (cuz it's hard to have one without the other in my opinion). But thankfully in the end I realized that was way too much work and would be too expensive. I ended up spending only about $1.52 per person (75 people total) on these gifts. Even if you are making enough for 100 it will be $1.41 per person.
And I'm kind of glad I didn't go to too much fuss and I got something I also like that doesn't perish quickly, because I ended up having about 25 extra gifts at the end of the night from people who had forgotten to take theirs. And a helpful hint: put the gift on the table at each place setting. I had mine on a table at the exit door and I guess some people missed them that way. If you put them on the tables at least the ladies will probably put them in their purses right away. Or better yet make something people can enjoy right then, like a tasty treat. I considered making French macaroons but that too is an ordeal and I would have had to make them fresh at least no more than a day or two from the wedding. Waaaay to much pressure.
But enough talk, on to the tutorial!
Cute Tea Wedding Favors
I just got some little gift boxes from Michael's that we're about $19.99 for a box of 100, and of course I used a 40% coupon since they always have them each week. So I paid about $12 for these. You can find them in the wedding section where all the little gift boxes are. They have square ones and then there are oblong ones like these in white and off white. They measure 3x2x1.5 inches, so perfect for a few tea bags
 |
 |
I started off with a label to put on the inside of the top flap that told people what the gift was and just to help out my fav tea shop I included their website in case people really liked it. (Kentucky Blend from Elmwood Inn Tea in Danville, KY. One Sachet makes two 8 oz cups of tea. To keep on enjoying this tea check out www.elmwoodinn.com) |

Then next comes the Thank You for Coming Sticker which will be the front face of the box.

In case anyone is wondering, I used the front called Blackadder ITC. I thought it had a quaint elegant country look to it. I also used this font for all my little signs I made like for the food, and some cute ones we used with photos.

Then you flip the box over and put the last label on the top of the lid, the ones that makes the gift make sense and hopefully make people go "Awww, too cute"

Love is Brewing...get it, then they see there is tea inside. I'm sure it at least caused a few chuckles. I used Georgia font for the other words. I thinks it's nice to mix up serif texts with script to keep things or eye appealing and easy to look at.

Oh, look who wants to come help Aunt Mary with her gifts too. Little John Luke and Eva!


He's the cutest little helper in the world.

After Kim has put the baby out of grabbing distance from the boxes, it;s time to assemble. Just fold up the box (remember the Love is Brewing label is on the top of the lid...

Then add 2 pyramid sachets of tea. I bought mine from Elmwood for a bag of 50 for $24. I bought 3 bags so about $73. Close the lid...

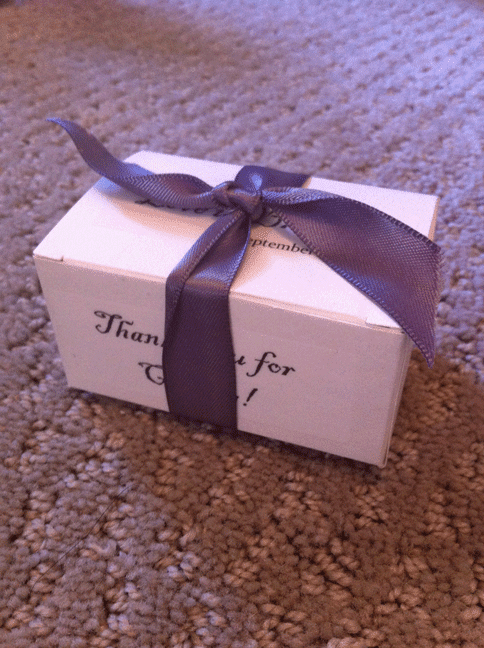
And add a pretty bow (in your wedding colors of course) to keep it sealed. I would recommend getting a thicker ribbon (at least 1cm) and just tying a simple knot like you see below. Doing a full on bow on something so small will drive you nuts. Just cut the edges at an angel and it will still look beautiful. I got the ribbon at Michael's as well for about $3.99 per roll and got 4 rolls, 2 in purple and 2 in gold.
So I hope I have inspired you to make something simple yet beautiful an thoughtful for your wedding. Just remember it is your day, so if someone doesn't like the GIFT you gave them tell them they can shove it...and thanks for coming to our wedding.
Subscribe to:
Posts (Atom)