//]]>

Friday, October 31, 2014

Blackened Chicken Alfredo

This semi homemade meal is sure to become a regular busy weeknight option for your family.  And with only 5 ingredients its sure to not break the bank either.  This meal is so easy even my husband can make it.  This is my moms Chicken Alfredo recipe and I hope you enjoy it.


Blackened Chicken Alfredo

From the Kitchen of: Lisa Murphy
Serves:3-4  Time: 30 mins


1-2 Tbl Olive Oil
1/2 package McCormicks Zesty Herb marinade seasoning
1 lb Chicken Breast/Tenders
Cooked Whole grain paste
Store-bought Alfredo sauce

If using chicken breast, cut breasts into chucks, or cut and pound into cutlets. Just make sure pieces are small enough to cook through in a pan.  Toss chicken in olive oil then add Zesty herb marinade seasoning, making sure to thoroughly coat with spices. Let sit in fridge or cook right away. To cook heat a non stick skillet to medium heat and add chicken pieces.  Turn to make sure all sides are cooked.  The spices should give the chicken a blackened look. Remove chicken to a plate.  Add Alfredo sauce to the pan and stir around, making sure to get the leftover spices into the sauce.  Add the cooked pasta. Place on plate to serve and top with cooked chicken.  This recipe goes great with Sauteed Mushrooms.

Friday, October 10, 2014

Hot Onion Dip

If you ever need a super fast yet amazingly tasty appetizer for unexpected guests my moms recipe for hot onion dip is exactly what you need.  It has 3 ingredients only and all the measurements are the same.  If you don't memerize it after the first time you make it...you should see a doctor for short term memory lose.


Hot Onion Dip

From the Kitchen of: Lisa Murphy
Serves: 4-6  Time: 20 mins

1 cup onion, chopped
1 cup cheddar cheese, shredded
1 cup light Hellman's Mayo (no subs or it will be too oily)

It seriously doesn't get any easier than this.  Mix all ingredients in a bowl, place is a shallow dish. Bake in the oven at 350 degree for about 15 mins or until bubbly and brown on the top. Serve with Ritz crackers (mom personal favorite)


Friday, October 3, 2014

Taco Seasoning

Forget about buying pre-made taco mix, with who knows what in it.  Instead, use this blend of spices everyone should already have their spice cabinet.  If you don't, we have a big problem...you need to expand your taste palette ASAP.  When you mix it all up it seems like a lot of spices for one pan of tacos, but it ends up being perfect.  Especially if you are like most of us and have had the same thing of cumin in you cabinet for like a year, so the flavor may have fadded a bit. I got this blend from Alton Brown.  He calls it Taco Potion #19, but I have yet to find the other 18 recipes.  My only tweek was I thought it had too much salt in it, at least for when used it with Boca Meatless Crumbles for vegetarian night, and I added a few more things.


Taco Seasoning

From the Kitchen of: Mary Holfelner
Serves: 3-4   Time: 5 minutes

2 Tbl chili powder
1 Tbl cumin
2 tsp corn starch
2 tsp smoked paprika
1 tsp ground coriander
1/2 tsp each cayenne pepper, garlic powder, and onion powder
1/4 fresh cracked pepper
salt to taste

Mix all ingredients but salt, then add to browned ground beef for tacos with 1/4 cup water.  After spices are well incorporated into beef add 1-2 tsp salt taste.

Friday, September 26, 2014

Honey Ham Slice


This is hands down the easiest, yet tastiest weekday dinner you will ever make.  The ham takes at most 10 minutes to make.  My mom would always make this and serve it with mac and cheese.  I find this to be the best side for it because the sauce for the ham goes great with the cheese.  It is also a great meal if you are cooking for 2 for a holiday meal like Christmas. You get a great flavorful ham, without having to eat ham leftovers for the next month. 


Honey Ham Slice

From the Kitchen of: Lisa Murphy
Makes: 2-3 servings    Start to finish: 10 minutes
 
1 one lb ham steak with center bone
2 Tablespoons honey, divided
2 Tablespoons brown sugar, divided
1 tsp ground mustard powder, divided
 
When cutting open the ham package make sure to pure the juice from the ham into a   10 inch non stick pan.  Cut the ham steak into the portion sizes you would like.  Using kitchen shears works best I find.  Place half of the honey, sugar, and ground mustard  the pan followed by the ham pieces. cook on medium heat for about 5 mins, then turn and cook another 5.  Make sure not to cook too long or the ham will dry out.  If making mac and cheese with this, I find it best to be cooking the ham by the time the pasta goes in the water.  There should be some juice left in the pan.  Place the ham pieces on the plate you are serving them then crank the heat for the pan up to high and cook off some of the moisture in the juice to make a nice sauce to put over the ham. 

Friday, September 19, 2014

Mom's Meatloaf

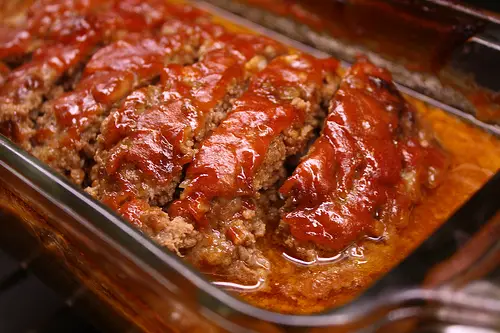
What says home more than meat loaf just like mom use to make?  Not many things can compare.  If you had to ask my what meal says US more than anything, it would be my mom's meatloaf, with my neenaws green beans and mashed potatoes.  Spoiler alert, this recipe does use Accent, which is msg, as you might know. If you are one of those people who is convinced msg is the devil itself, feel free to sub for regular salt.  I have done my own research and personally I don't think msg is as bad as they like to say, but I won't get on that soap box.  I have used it in small doses and I don't notice anything weird side effects.  Anywho, enjoy moms recipe, unaltered by my creative whims :)


Mom's Meatloaf
From the Kitchen of: Lisa Murphy
Makes: 6-8 servings    Start to finish: 1 hour 15 minutes

2 lbs ground beef (93/7)
1 1/2 cup bread crumbs
1 tsp accent (a.k.a. msg *gasp*)
1 pkg Lipton Onion Soup Mix
2 eggs
3/4 cup ketchup
1/3 cup warm water
1 Tbl Worcestershire sauce
2 slices bacon
1 (8 oz) can tomato sauce

Pre heat oven to 350 degree. Mix all ingredients in a large bowl, with your hands is easiest.  Place in a loaf pan and cover with bacon strips and tomato sauce.  Bake for 1 hour. If you like your meat loaf to be less juicy use a meatloaf pan that allows juices to go to the bottom of the pan.

Freezer meal option:  If you don't want to make a whole loaf, you can also place half of the meat in the pan and top with 1 slice bacon cut in half and half a can of tomato sauce. Then form the rest into another loaf and wrap in plastic wrap and then foil.  When you are ready to eat it, take it out and thaw in the fridge over night. Place in a baking pan and then top with bacon and 4 oz tomato sauce. Bake as directed above.

Friday, September 12, 2014

Chicken and Sausage Jambalaya

My mom always made this jambalaya when I was younger when she wanted a quick weekday meal.  Her version really only used cayenne pepper in the recipe, so I jazzed it up a bit and got a recipe for creole seasoning from Emeril. I also find it works best to wash the rice before to keep things from getting too goopy.  Andouille sausage is the traditional one to use, but for the longest time I always used smoked sausage like Kielbasa, as did my mom. It wasn't until I found a local place in Kansas City called Fritz' (103rd and Stateline) that makes their own sausage that I started using the real deal.


Chicken and Sausage Jambalaya
From the Kitchen of: Mary Holfelner/Lisa Murphy
Makes: 8 servings    Start to finish: 45 minutes

1 lb chicken breast, cubed
1 lb andouille sausage (can sub with smoked kielbasa), sliced
1 green bell pepper, chopped
1 medium onion, chopped
3 stalk celery, chopped
2 tsp each paprika, seasoned salt, garlic powder
1 tsp each onion powder, cayenne pepper, chili pepper
1/4 tsp fresh black pepper
pinch oregano
4 cups chicken broth
2 cups uncooked rice, washed and soaked for 30 mins

Saute chicken and sausage in olive oil until chicken is cooked, then add onion, green pepper, and celery and cook until tender.  Add all spices and cook a couple minutes.  Add broth and rice and cook for 20 mins or until rice is tender and liquid is absorbed.

Thursday, August 28, 2014

My Favorite Things: Apple Dumplings

So for those who don't know one of the jobs I had before I started college was working at Cracker Barrel.  I have actually worked at 3 different locations, in Danville, KY; Evansville, IN; and Bloomington, IN.  I can say a lot of things about Cracker Barrel.  Their managers are mostly assholes and they don't care about employees that much.  Tips are shit there since they cater to mostly old people who still think $1 is a good tip and they don't serve alcohol to maintain their "family" feeling (must be a baptist family).  But one thing I will never say about them is anything bad about the food.

I am a weird person in the fact that even after I have worked at a restaurant I still tend to love the food they make.  I worked for a cafe called Three Babes and a Monkey for over a year and to this day I still crave the chocolate muffins and tuna salad.  I worked at McDonalds for a summer and I still love me some chicken McNuggets.  And I worked at Cracker Barrel for a combined time of over 2 years and to this day I still love things like their grilled chicken tenders and pecan pancakes.  But one of my all time favorite things from there is their Apple Dumpling.


I was not a fan of desserts involving baked fruit until I had this dumpling. It.Is.Awesome.  I am especially a fan of the pecan streusal on top. The best part about all this you can get the stuff from Cracker Barrel to make this dessert at home.  Though I like to doctor it up a little by adding pecans to the topping.  To make the apple dumpling, though really it becomes an apple crumble when you make it at home all you need is...


And


Just place the apples in an 8x8 pan.  Mix the topping mix with cold butter until it looks crumbly.  Fold in pecans if you like them, I go with pecan halves and crush them a little. then just serve with ice cream!


Friday, August 22, 2014

Grilled Chicken Fajitas

This is one of those recipes I have had around for so long I can't even remember where it came from.  More than likely it came from Taste of Home, but which issue it was in I have no clue.  And of course I have tweaked it here and there to cater to my own tastes.  The key I find is to grill the chicken instead of pan frying it like some recipes do, and to not over cook the peppers and onions.  No one likes a soggy bell pepper.  If you like a bit more spice you might add some jalapeno peppers as well.


Grilled Chicken Fajitas
From the Kitchen of: Mary Holfelner
Makes: 4-5 servings    Start to finish: marinade+30 mins

1 Tbl Worcestershire sauce
1 Tbl soy sauce
1 Tbl cider vinegar
1 Tbl lime juice
1 tsp chili powder
1/2 tsp onion powder
2 cloves garlic powder
1/4 tsp ground cumin
1/4 tsp cayenne pepper
1 lb chicken breast, pounded 1/4 inch thick
2 Tbl butter
1 small onion, sliced into wedges
1 bell pepper, sliced into strips
flour tortillas

Combine first 9 ingredients and toss with chicken in a food storage bag.  Marinade for at least 1 hour, but longer is better  Grill chicken over medium high heat. Meanwhile use butter to saute onions and peppers in a skillet for 4-5 minutes until tender crisp. Let chicken sit for a few minutes before slicing it to strips. Serve with the peppers and onions on the flour tortilla and other topping like sour cream and cheese.

Friday, July 4, 2014

What's in my Garden? Clematis

I grew up watching my mom garden all the time, and one of my favorite things that came up each spring was per giant Clematis vine.  She had a beautiful plant growing right by the door.  It is a vineing plant with traditionally single blooms,usually in purple, though now you can fine double bloom varieties as well as other colors like white and red.  The kind I have is called Barbara Jackman.


Common Name: Barbara Jackman Clematis
Scientific Name: Clematide Barbara Jackman
Bought From: Lowes

Sun
Part to full sun.  6 hours is ideal, but they can grow with less.  They like to have their feet covered to help upward growth, so planting other things at the base is a good thing to do.  Here is a good example of how different sun causes different growth.  I have 2 plants growing on either side of a window.  One gets more sun than the other, since the one of the left starts getting covered by the shade of the deck.


The one that gets tons of sun really grew more like a bush, as you can see above.  I don't have any plants in front of the clematis so the feet are not covered like they usually prefer.  I'm thinking this contributed to the weird growth this year.  


The other one had less shade and grew up more on the trellis and had nice evenly spread blooms.

Soil
Prefers neutral to slightly alkali soil.  If you have acidic soil you can sweeten it by adding some limestone of a little wood ash at the start of spring.

Size
As tall your trellis will go :) Usually no more than 6-8 ft

Water
I always water them about twice a week when there is no rain

Fertilize
Use compost and a general 10-10-10 granular fertilizer when you first plant.  After it's first season put compost around the base each spring with granular fertilizer, and then water twice more with fertilizer during the growing season with a water soluble fertilizer like Miracle Grow.  I also like to hit all of my garden with some Super Thrive every so often, maybe about once a month at most, usually at the same time as fertilizing.

Pruning
There are 3 groups of Clematis that determine some of their characteristics like pruning rules. The Barbara Jackman variety is a part of group 2, meaning it is a repeat bloomer.  It blooms a lot in late spring or early summer, then sporadically throughout the summer on new shoots and old stems. since this clematis can grow on old growth so there is no need to prune unless you think it getting too tall or vines get too thick and tangled.  If you do need to prune it is best to do light pruning in late winter before blooming starts.  You can also cut back back half every other year, or cut down fully to within one foot the ground every few years.

Wintertizing: lightly mulching is fine, bit keep mulch away from crown of the plant.

Tuesday, July 1, 2014

Ceasar Dressing

This recipe comes straight from our wonderful neighbors, Mark and Linda.  Every time we have dinner with them I end up wanting to steal a recipe to add to my collect.  First it was a recipe for Apple Bunt Cake, then one for a Strawberry Cake, now I can finally say I have a homemade amazing Caesar salad recipe.  I tried making Caesar dressing a while back when I watched an episode of Good Eat all about eggs, but it just did not work out, and was nothing compared to this one. So I hope you enjoy this recipe too!  Tell me what you think in the comments, and please, don't let the anchovies or egg scare you into not trying it.


http://search.chow.com/thumbnail/480/0/www.chowstatic.com/assets/2010/08/11120_caesar_dressing_620.jpg


Caesar Dressing

From the Kitchen of: Mark and Linda Bureman
Serves 3-4 people on a salad

1 egg at room temp
1/2 cup extra virgin olive oil
1/4 cup white or red wine vinegar
3 anchovies
3 large cloves garlic
1/2 tsp Worcestershire
1/4 tsp Tabasco sauce
juice of 1 lemon
1/4 tsp Dijon mustard (or other, just not regular yellow kind)
1/4 cup Parmesan/Reggiano cheese
salt and pepper to taste

First, How to Coddle and Egg

  1. Start with a very fresh egg that is room temperature (you can place in warm water to warm if needed).
  2. Fill a small saucepan (deep enough to cover the egg) with water and bring to a boil.
  3. Using a spoon, carefully lower the egg into the boiling water.
  4. Remove from heat, cover, and let sit for 2 minutes.
  5. Remove from the water and immediately run under cold water.
  6. Crack the egg over a small bowl – you may notice that some of the white has begun to cook (that is a-okay).
  7. Pour the egg into the container you plan to use to make your dressing.
Once the egg is coddled place it in the food processor.  Add all other ingredients, but salt and pepper. blend everything together, add salt and pepper to taste on top of salad. Garnish with whatever like such as more anchovies, croutons, or extra parm cheese (I prefer fresh grated for this part).


Wednesday, June 25, 2014

Battle Against the Deer: trying an in-ground garden.


Our raised bed garden has done much better this year in terms of producing crops.  But I have gotten to the point where I am tired of the cramped space.  Raised bed may be more “efficient” to some people but I grew up with the traditional long row of single crops type garden my whole life and we did just fine. So I have taken it upon myself to give it a try, regardless of the fact that we have crazy amounts of deer in the area.  I’m hopeful though because a) it has been a wet spring so hopefully the deer are happy and have food in the woods, and b) I have a game plan. 

My neighbors Mark and Linda, are convinced that we have super deer that are impervious to all tricks we throw at them.  But since I’m young and (as my grandma would say) full of piss and vinegar I am determined to not be out smarted by them. I have been researching ways to repel deer so here is the plan:


  1. Place garden fairly close to the house
  2. Build an admittedly short, but hopefully effective fence around the garden made of garden stakes and fishing line.  My theory is that the deer will touch the line, but since they can’t see it is will freak them out and make them go elsewhere. 
  3. Use spray and pod deer repellant, and possible some squirrel stuff too since they can be annoying. 
  4. Put something that moves and is shiny like a windmill in or around the garden to deter pests.


I also had a crazy idea for this fall.  I know for a fact the deer never touch my daffodils since they are poisonous to them, so the idea of planting lots of buttercups around the garden has occurred to me.  Sadly they don’t last throughout the summer, so I don’t know why effective it could be.  But they are pretty so it couldn’t hurt. 

So this is the plan.  I’m hoping and praying it works so I can finally enjoy a real garden.  Even though it is June it is not too late plant some things like corn, green beans, carrots, and squash. I have a spot mapped out in my head and will post updates as things progress so stay posted

If you have any tips about how to keep deer away from your garden and plants you would like to share, post in the comments!

Friday, May 9, 2014

Tomato Celery Soup

This recipe comes from my mom who got the recipe from the cooks at the Shaker Village of Pleasant Hill in Kentucky.  We use to go there on occasion growing up and eat at the restaurant they ran there.  I still remember as a kid being fascinated by the little decorative balls of butter they served with the fresh rolls. She loved this recipes so much she had to get it from them and they were nice enough to share.  It's super easy since you use a can of Campbell's soup, but since you add a few things extra it just really gives the soup a nice zing.  I made this a lot during college for my friend as I as well and everyone raved about it.


I always make these with grilled cheese and serve it with saltines. I personally don't like my tomato soup to be chunky so I use a stick blender right before serving to smooth it out. But if you like chucks you can skip this part.  And while the original recipe doesn't call for it you can always add a bit of heavy cream to add some depth to the dish and even out the tang.

Tomato Celery Soup
From the Kitchen of: Lisa Murphy
Makes: 2-3 servings    Start to finish: about 20 minutes

1 small onion, chopped
            ½ cup celery, chopped
            1 Tbl butter
            1 can condensed tomato soup
            1 can water
            1 Tbl lemon juice
            1 tsp sugar
            1 tsp dried parsley
            ½ tsp salt
            ¼ tsp pepper
            Extra minced parsley

Sauté onion and celery in butter, but do not brown.  Add rest of ingredients, then bring to a boil.  Lower to a simmer for 5 minutes.  Garnish with cream and extra parsley.  Serve with grilled cheese and saltines.  

Sunday, May 4, 2014

Asian Coleslaw

This is a recipe I always end of forgetting about, but it is totally awesome.  It makes a lot, just to be warned.  This one comes from my mom who says she can't remember where she got it from either.  Asian coleslaw has many renditions and ways to do it, but I love this one and it is great for summer picnics.  


Asian Coleslaw
From the Kitchen of: Lisa Murphy
Makes: 12 servings    Start to finish: 20 minutes + chilling

2 pkg beef Ramen noodles, seasoning package set to the side
            16 oz slaw mix
            8 oz broccoli slaw mix
            1 cup slivered almonds, toasted
            1 cup sunflower seeds, unsalted
            1 bunch green onion, chopped
¾ cup vegetable oil
            ½ cup sugar
            1/3 cup white vinegar

Remove noodles from package, crush up then place in the bottom of a large salad bowl.  In layers, add slaws, almonds, sunflower seeds, and green onion.  Whisk together oil, vinegar, sugar and seasoning from noodles, then pour over layers. Chill for 12 hours and toss when ready to serve. 

Friday, May 2, 2014

Chicken Tikka Masala

I have to say that this recipe, in my personal opinion, rivals even Chicken Tikka from a real Indian home.  I first got into Indian food after my friend Sidd made Chili Chicken for me and my husband (at the time boyfriend) and taught me how to make Chicekn Biyriani back when I lived in Bloomington, IN.  I love the flavors of all the aromatic spices.  I would have never thought cinnamon or cloves belonged in a savory dish, but they are awesome in curry.  Now I have a few Indian dishes under my belt and this is one of my favorites.


I got this recipe first from, where else, Pinterest.  But I found the original recipe lacked a lot of the intense flavor Indian food has.  It started off having maybe only 1 Tablespoon of spices total in it, and by the time I was done with it it has closer to double that.  I always serve this dish with my aromatic rice and naan bread.

Chicken Tikka Masala


Marinade

1 cup plain yogurt
3 Tbl ginger garlic past, recipe follows
1 tsp kosher salt
1/2 tsp fresh ground pepper
1 pound boneless skinless chicken (thighs or breast)

Sauce

2 tsp olive oil
3 Tbl butter
1/3 cup ginger garlic paste
2 serrano peppers, seed removed and chopped (leave in seeds if you like a lot of spice)
1 Tbl garham masala
2 tsp paprika
1 tsp chat masala
1/4 tsp each ground coriander, ground cardamon, and crushed red pepper
8 roma tomatoes, pureed
1 1/2 tsp kosher salt
1 cup water
1/2 cup heavy cream
Fresh cilantro for garnish

ginger garlic paste

4 oz (by weight) garlic
4 oz ginger
2 oz canola or veggie oil

For the marinade: In a large bowl, mix together the marinade ingredients. Add the chicken and toss to coat. Marinate at least 30 minutes, or in the refrigerator up to overnight.

For the sauce: When you're ready to make the curry, place a large skillet over medium heat and add the olive oil and butter. When the butter has melted, add the Ginger-Garlic Paste and serrano peppers. Saute until lightly browned around the edges. Add the tomato paste and cook until the tomato has darkened in color, about 3 minutes. Add the spices and saute for about 1 minute to draw out their flavors.

Add the tomatoes, salt, and 1 cup water. Bring to a boil, turn down to a simmer, and cook until thickened, about 20 minutes. You may need more water depending on how much liquid the tomatoes give off.

Meanwhile, fire up your grill. When it is nice and hot, lightly brush it with oil. Place the chicken on the grill, shaking off some of the excess marinade. Cook until it's charred, about 2 minutes on each side. (Don't worry that the chicken will still be a little uncooked, it finishes cooking in the sauce).

 Add the chicken and cilantro, if using. Take the heat down to a simmer and cook for about 10 minutes. Add the cream and stir through. Garnish with minced fresh cilantro, and serve over rice, with naan, or a crusty piece of bread!

Ginger-Garlic PasteThrow the garlic, ginger, and canola oil in a mini-food processor and let it go until it forms a semi-smooth paste. There will still be tiny little pieces in there, but overall, it should resemble a paste.

Save what you don't use in a small glass jar. It should last in the fridge for 2 to 3 weeks. It's a delicious addition to marinades, pasta sauces, stir fry sauces, slow-cooker recipes, gravy etc. We always had a jar of this stuff in our fridge growing up

Sunday, April 13, 2014

My Favorite Things: Stiegl Radler

I have found a new love in my life and thankfully my husband isn't too jealous. In fact we enjoy both partaking in my new found love together...OK get your mind out of the gutter.  I'm talking about beer. 


Recently, while out with some friends this past weekend at a place I had never been to called Haus up North of Plaza, I experienced this new amazing beer that I think ever woman can enjoy, even those who say they don't like beer.  It's called Stiegal Radler and it is, get this, a grapefruit flavored beer.  It's seriously refreshing and that could be due to the fact that is only has like 2.5% alcohol.  I was able to take massive gulps of this stuff and I am not a beer chugger by trade.  

So yeah it's not a super manly beer that the hardcore drinkers might like, but it is a new favorite of mine and I feel it is a good starting place for any person who is unsure about getting into beers.  It still has that nice beer aftertaste, and thankfully the grapefruit flavor doesn't make it bitter like an IPA (not my favorite kind).  And the best part is anytime I want it I don't have to pay $7 a pint like I had to at Haus.  I found a 4 pack of 16 ounce cans at Gomers Fine Wine and Spirits here in Kansas City for only $9.  $2.25 a pint sounds way better to me. 

Saturday, March 1, 2014

What's in My Garden? Bella Anna Hydrangea

I love Hydrangeas.  I think I can officially call them my favorite flower, which I guess is evident in the fact that I used them in all my wedding flowers.  Last year I decided to try a Bella Anna Hydrangea, not to be confused with the Annabelle Hydrangea which comes in white.  Technically the Bella Anna is a type of Annabelle.  I chose this one mostly because I loved the antique pink colored blooms.  Their blooms tend to be made up of smaller flowers in clusters, as opposed to the bigger flowers in cluster you see with the original mop head hydrangea.


Common Name: Bella Anna (part of the Annabelle family)
Scientific Name: Hydrangea arborescens
Brand: Endless Summer
Sun: Full Sun to Part shade.  Prefers morning sun with afternoon shade or dappled light.
Soil: Prefers acidic soil. To help acidify soil naturally, take used tea and place it under the plants. 
Size: 3-5' by 3-5'
Water:I always water them about twice a week when there is no rain, or when they look droopy.
Fertilize: Use a handful of fertilizer at planting and again in early March.  They make special acid loving fertilizers you add to water as well, but avoid using when plant is in full bloom. 
Pruning: Deadheading spent flowers will encourage new buds to set and bloom throughout the year.
Endless Summer flowers can grow on both old and new wood so there is no need to prune in the early spring with the Bella Anna.  Only prune if you want to make the bush smaller in early spring before blooming starts.
Wintertizing:  The first 2 years you have your plant,cover the base with extra mulch to protect from extreme weather.


I got the Bella Anna because I wanted something to in the part of my garden that is pretty much under my deck and thought a hydrangea would do well since they like dappled light and some sun comes through the deck boards.  Sadly I was pretty much wrong.  Bella Anna needs quite a bit more sun than that and I could tell it wasn't doing well when the blooms, which started off pink, started to turn green.  I kept it there through the winter, which may have saved it since it got some cover from the weather by being under the deck.  We had a terrible winter with temperatures below 0 some days.

I knew the Bella Anna wasn't happy where it was when I noticed all my other mop heads were starting to sprout and the Bella Anna was doing nothing.  So I decided to move it to a bit sunnier spot.   ended up moving it to the North west portion of my flower bed, where it would be a bit shaded by a trellis at times but still get a good dose of full sun during the day as well.

Even after moving I still didn't see much growth and was pretty sure it was dead,but then all of a sudden ...

Hydrangea - Sprout

So she's not dead yet! (did anyone else just think of Monty Python?)  She's taking her time, but it looks like slowly she will come back to life.  Sadly one thing I also did wrong was I pruned back the old wood so I'll have to wait till next year to get any real good growth.

Keep and eye out for updates! 


Saturday, February 15, 2014

A Kentucky Classic, Derby Pie

To be completely honest, I can not say I grew up eating derby pie all the time or even ever year to celebrate the Kentucky Derby.  I wanna say one of the first times I really had it was actually when I made this recipe which I found  on My Cooking Spot.  I made this for some friend who came over to a doggie play date and I'm glad I did because it was awesome.


My only notes I would add to the original recipe is it did not mention some specifics like what kind of butter or chocolate chips to use so I made sure to mention what I used in this version.  One thing I think made this recipe particularly awesome was the fact that I did not use a frozen crust, I got one that was refrigerated. I think those ones are a little better since they don't get freezer burn.  Of course if you have an awesome homemade crust recipe then go for it, but a store bought one will not ruin this pie.  Another factor was the fact that I used real pure vanilla, and mine was actually from Mexico (I got it when we were there for our honeymoon).  It gave the pie just that extra hint of awesome.  Also make sure to do is have chopped pecans, bit halves, even if you kind of crush them yourself.  If there are big chunks of pecans in the pie it makes it super hard to cut into nice looking slices.  But enough talk, here is the thing you came here for.  


Derby Pie

Total time: 2 hours 20 mins

1/2 cup unsalted butter, melted
1 cup sugar 
2 eggs 
1 tsp pure vanilla 
1/2 tsp salt 
1/2 cup whole wheat flour 
1 cup pecans, chopped 
1 cup milk chocolate chips 
1 refrigerated pie crust

Preheat over to 325 degrees.  Press pie crust into a 9 inch pie pan, trimming any excess crust and crimping the edges.  Mix butter and sugar then add eggs and vanilla and mix well. Add salt and flour, and mix well. Fold in pecans and chips. Pour mixture into pie crust and bake for 1 hour. Let cool for 1 hour before slicing. Serves 6-8.

Thursday, January 30, 2014

Better than Bdubs Buffalo Wings

My taste buds go through various cycles and I tend to become obsessed with various taste for weeks, maybe months at a time.  Lately a favorite of mine has been Buffalo sauce.  I have been wanting to eat it constantly and on everything.  But what goes best with buffalo sauce more than chicken wings.  While I am not unknown to go for the full fat fried and dunked in sauce version I tried a lighter version recently that I was delightfully surprised by.  I found a pretty decent way to bake chicken wings and still get that nice crisp skin you want and be juicy inside.  My sauce recipe comes from AllRecipes.com with a slight alteration due to personal taste.  Best part is this recipe is just in time for the super bowl.


The original recipe makes a ton of sauce, and I usually just cook for 2 for I make enough to cover about 10 whole wings with some left over to save for dunking chicken tenders in.  I always thought buffalo sauce just involved hot sauce and butter.  But this recipe really kicks it up a notch with the extra stuff.  The key to having the wings come out nice a crisp is having the wings roast on a cookie rack in the over so the oil drops down and air circulates well, as well as brushing it with oil.  I prefer to use whole wings mainly because I'm lazy and don't care for cutting up wings.  And don'tskim on the kosher salt and fresh pepper.  They will always be way better than table salt and pre ground crap.  And to make the sauce less spicy just us less hot sauce to your taste.

Baked Buffalo Wings


Wings
10-15 whole chicken wings
Vegetable oil
Kosher salt
Fresh cracked pepper

Sauce
1/2 cup Frank's RedHot® sauce
1/4 cup unsalted butter
2 tsp white vinegar
1/4 tsp Worcestershire sauce
1/8 tsp cayenne pepper
1/8 tsp garlic powder
salt to taste

Preheat over to 400 degree.  Rinse Chicken wings and pat dry with a paper towel.  Place wings skin side up on a metal cookie rack and place that on a cookie sheet lined with parchment paper or foil to keep oil for messing up the pan.  Brush skin side of wings with oil.  Sprinkle with kosher salt and fresh cracked pepper to taste.  Roast in over for 20 minutes.  Turn wings and roast another 10 minutes.  Turn once more and change oven to broil.  Broil wings skin side up for about 5 minutes or until skin is crisp and lightly browned.  While wings cook combine the all the sauce ingredients in a pot and place over medium heat. Bring to a simmer while stirring with a whisk. As soon as the liquid begins to bubble on the sides of the pot, remove from heat, stir with the whisk, and set aside for use.  Once wings are roasted place in a bowl and toss with sauce

Thursday, January 16, 2014

Foster Dog: Hanzel (Hanz)

Hanz' favorite place, sitting in the corner of the couch.  


Help us find Hanzel his forever home!    


Quick Facts


From: Kansas City Pet Project (Link to profile)
Gender: Male
Age: 6 years (estimated)
Altered: Yes
Breed:  American Pit Bull Mix
Came into Foster:  Jan 11th, 2013
Reason for Intake: Stray
House Broken: Yes
Kennel Trained: No, he escapes from kennels, but is not destructive when left in the house alone
Leash Trained: Yes, but does best with a Gentle Leader
Rides in Car Well: Yes
Bathtime:  He does great and does not freak out, he even gets in the tub on his own (with the help of a cookie or too)
Groomers: Yes

Does well with…
Other Dogs: He can be selective (read more below)
Cats: Not Yet Tested
Other Small Animals: Yes, he has been around 2 fancy rats
Children: Not Yet Tested

His Favorite Thing: Sleeping on the couch and cuddling
His Least Favorite Thing: getting his teeth brushed
He is Motivated by:  Attention and love
Commands He Knows: Working on sit, down, how to stay out of the way in the kitchen, and asking permission to get on the couch.

Interesting Fact about Hanz: He has the loudest most violent sneeze you will ever heard, and has the magical ability to always lick you right as you are opening your mouth. 


Hanz is a lovable pooch who is a great ambassador for his breed.  Hanz shows that not all pits are the terrible beasts everyone thinks they are.  He is a total lover who is happiest just cuddling all day with you on the couch, as well and keep you warm in bed.  He loves acting as a foot warmer or a pillow for you.  He is motivated by love and attention and while he likes treats he does not get too excited about them (nowhere near as much as our dog Eva). He also doesn’t seem to know what toys are all about, but he does enjoy chewing on a kong.  If he get's real playful he might chew on a rope toy. He tends to only bark when other dogs do, or when he hears unfamiliar sounds from outside.  He barks when people come to the door, so he makes a good alarm system :) but it is best to take him into another room before the people enter so they can meet him without being intimidated by him.  Once people are inside and he has met them he relaxes and just lays back down on the couch. 

He is a mellow dog who tends to match his energy level with other dogs around him.   However if you have an excitable dog or one who is selective I would highly recommend you do a dog to dog meeting to make sure Hanz and your current dog get along.  He does tend to correct other dogs who he thinks are being too high energy by nipping them, which may come across as try to start a fight.  But at KCPP they just call him a fun hater, because he would go around in play groups correcting other dogs who were getting too rough while playing.  Basically, he acts like a grumpy old man sometimes who has to put young whipper snappers in their place:) We have a female 5 year old dog who is very mellow as well with small burst of playfulness and they get along great.  

Hanz is house broken and has very good manners in the house and learns new house rules quickly.  While he loves the couch and the bed he knows at our house he can’t get up until he is invited (unless we aren’t home, then all bets are off).  He has occasional spurts of energy and playfulness, mostly when you get home for the day.  Then he loves to go outside and run circles around the yard…gallop is really more the word.  It is difficult to keep Hanz in a kennel since he seems to be part magician and always gets out. Even after adding locks to the latches of his wire kennel he still managed to undo the bottom one and wiggle his way out.  The good news is he is not destructive when left alone in the house, he just want to be in a more comfortable place than a kennel. 


It looks like Hanz was a stray for a while because he has a lot of tartar and plaque buildup on his teeth and some look chipped for what he has eaten.  Due to this he has pretty bad breath but is very leery to getting his teeth brushed and fights it a lot. His glums have shown signs of bleeding.  I would recommend whoever adopts Hanz takes him to see the vet to get a good professional teeth cleaning and then get him use to regular dental care.  Hanz does well when it comes bath time and doesn’t fight you hardly at all, but he does get a little bit of dry skin, so a conditioner should be used with each bath, and he could also benefit from some fish oil with his meals.  Other than that he appears to be a happy healthy boy.